
 pin it
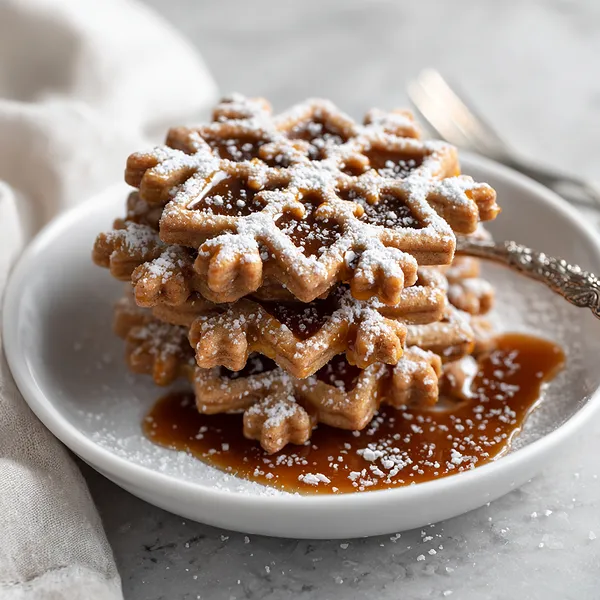
I first encountered snowflake cookies at a holiday market in Vermont, where a small bakery was selling them for what I thought was an outrageous price. But after one bite, I understood why—the delicate texture, the intricate shape, the way they seemed to dissolve on your tongue. When I got home, I became obsessed with recreating them, but I wanted to add my own twist. That's when I thought about salted caramel, which has always been my weakness. The base of this recipe is a classic shortbread dough, rich with butter and just sweet enough, that gets rolled thin and cut into intricate snowflake shapes using a special cookie cutter. The real magic happens after baking, when you drizzle warm, homemade caramel sauce over the cooled cookies and finish them with a sprinkle of flaky sea salt. The result is a cookie that's simultaneously crispy and tender, sweet and salty, simple and sophisticated. It's the kind of recipe that makes people think you spent hours slaving away, when in reality, it comes together in less than an hour from start to finish.
Why I love this recipe
What I love most about this recipe is how it manages to be both impressive and approachable. The snowflake shape makes them feel special and festive without requiring any advanced decorating skills—the cookie cutter does all the work for you. The dough is incredibly forgiving; even if you overwork it slightly, the cookies still turn out tender and delicious. But it's really the salted caramel that elevates these from good to absolutely unforgettable. There's something about that sweet-salty combination that hits every craving at once. I also appreciate how versatile they are—you can make them days in advance and they actually improve with time as the caramel softens into the cookie slightly. They stack beautifully for gifting, they photograph like a dream, and they never fail to impress guests. Plus, making them has become one of my favorite winter rituals. There's something meditative about rolling out the dough, pressing those snowflake shapes, and watching the caramel ribbons fall across the finished cookies. It's the kind of recipe that brings joy not just in eating, but in the making itself.
What You Need From Your Kitchen
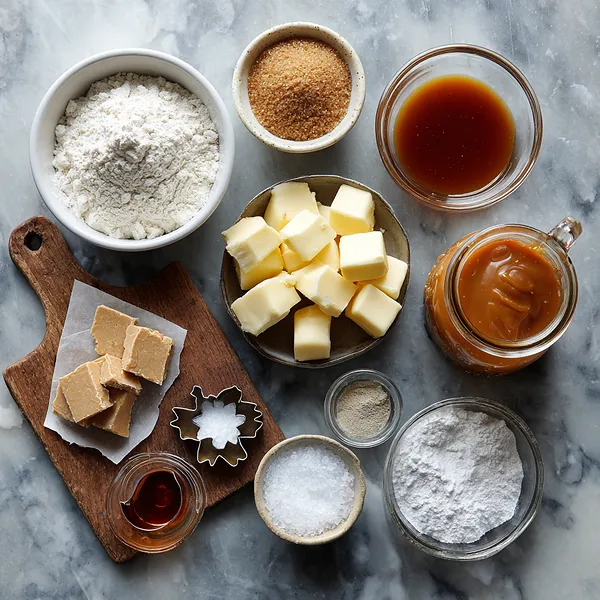
- All-purpose flour: Sift before measuring for lighter cookies
- Unsalted butter: Bring to room temperature and cut into cubes
- Powdered sugar: Sift to remove lumps for smoother dough
- Vanilla extract: Use pure vanilla for best flavor
- Caramel sauce: Warm slightly before drizzling for easier application
- Flaky sea salt: Use coarse flakes like Maldon for best texture and flavor
Let's Make These Together
- Create the buttery dough base
- Start by beating your room temperature butter with powdered sugar until it transforms into a light, fluffy cloud. This creaming process is crucial—it incorporates air that gives your cookies their tender, melt-in-your-mouth texture. When you add the vanilla, you'll smell that warm, comforting aroma that makes baking so magical. Then gently fold in your flour mixture just until combined. The key here is a light touch; overworking the dough develops gluten, which leads to tough cookies instead of delicate, crumbly ones.
- Shape your winter wonderland
- Rolling cookie dough can be tricky, but here's the secret: work between two sheets of parchment paper. This prevents sticking without adding extra flour that would make your cookies dry. Roll to an even quarter-inch thickness—thick enough to maintain the intricate snowflake details, thin enough to stay crispy. When you press down with your snowflake cutter, use firm, even pressure and give it a little twist to ensure clean edges. That refrigeration step isn't optional; chilled dough holds its shape beautifully in the oven.
- Bake to golden perfection
- Your oven temperature matters more than you might think. At 325°F, these cookies bake slowly and evenly, developing flavor without browning too much. Watch them carefully in those final minutes—you want just a hint of gold at the edges while the centers stay pale. When they come out, they might seem slightly soft, but don't worry. As they cool, they'll firm up into that perfect shortbread texture with a satisfying snap.
- Crown with caramel magic
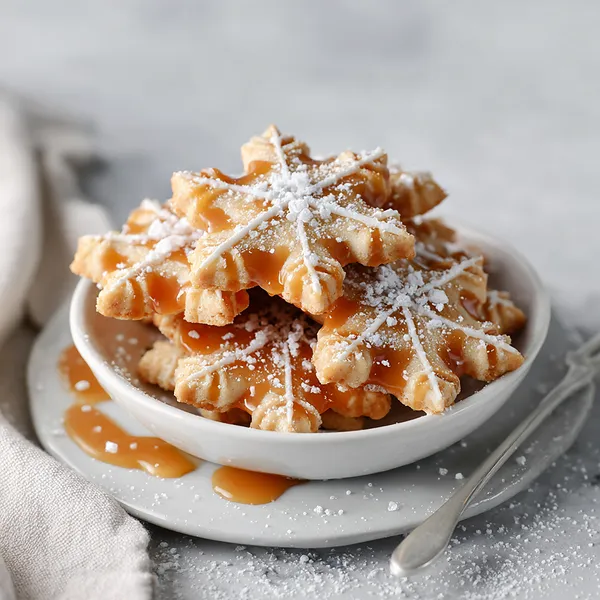
- This is where your cookies transform from lovely to absolutely stunning. Warm caramel should flow smoothly but not be so thin that it runs off the cookies entirely. Drizzle with confidence—messy, organic patterns look more artisanal than perfect lines. That immediate sprinkle of sea salt is crucial; it needs the wet caramel to stick to. As the caramel sets, it creates a glossy, slightly chewy topping that contrasts beautifully with the crisp cookie underneath. The salt crystals catch the light and provide little bursts of flavor that make each bite more interesting than the last.
 pin it
Switch Things Up
I made these cookies last December when I was desperately trying to find something special for my office party. I'd been scrolling through recipe after recipe, feeling uninspired, when I stumbled upon the idea of combining shortbread with salted caramel. The first batch came out of the oven looking absolutely stunning—those snowflake shapes held their definition perfectly. But here's where it got interesting: I drizzled the caramel while it was still warm, and it created these beautiful cascading ribbons that hardened into the most gorgeous pattern. My coworkers went absolutely wild for them. Three people asked for the recipe before the party even ended, and one colleague told me she'd been dreaming about them for days afterward. Now I make them every winter, and honestly, I've started keeping extra caramel sauce in my pantry year-round just in case the craving hits.
Perfect Pairings
These cookies pair beautifully with a strong cup of coffee or espresso—the bitterness cuts through the sweetness perfectly. For a more indulgent experience, serve them alongside hot chocolate topped with whipped cream. If you're creating a dessert spread, they complement vanilla ice cream wonderfully, or try them with a cheese board featuring sharp aged cheddar to balance the sweetness. A glass of cold milk is also a classic pairing that never fails, especially when you want that nostalgic cookie-dunking experience.
 pin it
Frequently Asked Questions
- → Can I make the dough ahead of time?
Absolutely! The dough actually benefits from resting. You can wrap it tightly in plastic wrap and refrigerate for up to 3 days, or freeze for up to 3 months. Just let it sit at room temperature for about 10-15 minutes before rolling if it's too firm.
- → What if I don't have a snowflake cookie cutter?
No problem! You can use any shaped cookie cutter you have—stars, circles, or even simple rounds work beautifully. The caramel drizzle will make any shape look festive and elegant. You could also cut them into squares or rectangles with a knife for a more modern look.
- → Can I use store-bought caramel sauce?
Yes! Store-bought caramel sauce works perfectly for this recipe and saves time. Look for a high-quality sauce with real cream and butter for the best flavor. Just make sure it's a drizzling consistency—if it's too thick, warm it gently before using.
- → How do I prevent the cookies from spreading during baking?
The chilling step is your secret weapon against spreading. Always refrigerate your cut cookies for at least 15 minutes before baking. Also, make sure your butter wasn't too soft when you made the dough, and avoid overbaking, which can cause butter to leak out and create spreading.
- → Why did my caramel drizzle get too hard or too runny?
Temperature is everything with caramel! If it's too hard, it was probably too cool when you drizzled it—warm it a bit more next time. If it's too runny, either it was too hot or your caramel sauce was too thin to begin with. The ideal consistency is like thick honey that flows slowly off a spoon.
- → How should I store these cookies?
Store them in an airtight container at room temperature, placing parchment paper between layers to prevent sticking. They'll keep for up to 5 days, though the caramel may soften slightly over time. Don't refrigerate them, as this can make the cookies lose their crisp texture.
Conclusion
These Salted Caramel Snowflake Cookies are everything a holiday cookie should be—beautiful, delicious, and surprisingly simple to make. The combination of tender, buttery cookies with rich caramel and a touch of sea salt creates a flavor profile that's both elegant and comforting. They're perfect for cookie exchanges, gift giving, or simply enjoying with your favorite hot beverage. Once you master this recipe, it'll become a seasonal staple in your baking repertoire.