
 pin it
I first discovered the magic of no-bake vegan cheesecakes during a summer when my oven broke right before a dinner party. Desperate for a dessert solution, I started researching alternatives and stumbled upon the world of cashew-based cheesecakes. I was skeptical at first – how could nuts create that signature creamy, tangy cheesecake texture? But after soaking the cashews overnight and blending them with coconut cream, lemon juice, and a touch of maple syrup, I was absolutely blown away. The filling was so silky and luxurious, it rivaled any traditional cheesecake I'd ever made. The golden graham cracker crust provided the perfect buttery contrast, and when I topped it with fresh raspberries and edible flowers, it looked like something from a fancy bakery. What I love most is how forgiving this recipe is – the no-bake method means there's no risk of cracks or overbaking. You simply blend, pour, chill, and wait for the magic to happen. Every time I serve this, I'm reminded that some of the best culinary discoveries come from necessity and a willingness to try something new.
Why I love this recipe
This recipe holds a special place in my heart for so many reasons. First, it's incredibly versatile – I can dress it up for elegant occasions or keep it simple for casual gatherings. The fact that it requires no baking makes it perfect for hot summer days or when I'm short on time. I love how it proves that vegan desserts can be just as indulgent and satisfying as traditional ones, if not more so. The creamy cashew filling is naturally sweet and tangy, with a richness that comes from whole food ingredients rather than processed alternatives. I also appreciate how this recipe has become a bridge for my non-vegan friends and family to explore plant-based eating. When they taste this cheesecake, they realize that choosing plant-based options doesn't mean sacrificing flavor or texture. The visual appeal is another reason I adore this recipe – those vibrant raspberries and delicate edible flowers make every slice Instagram-worthy. But beyond the aesthetics, it's the pure joy on people's faces when they take that first creamy bite that makes this my go-to dessert recipe time and time again.
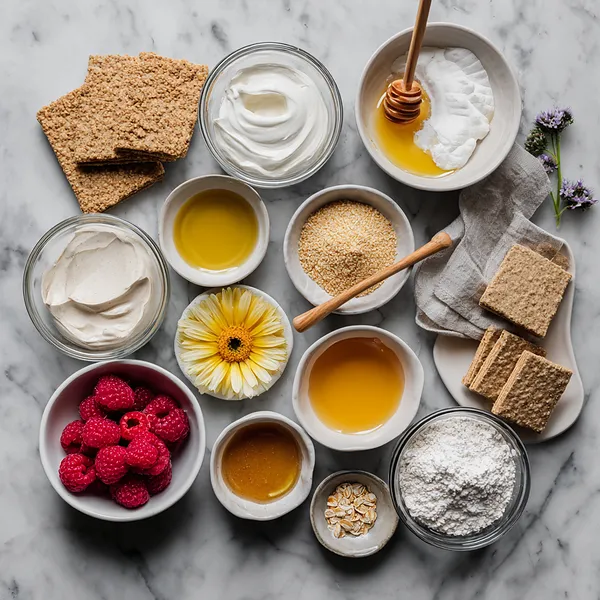
What You Need From Your Kitchen
- Raw cashews: Soak overnight in water, then drain and rinse before blending for ultra-creamy filling
- Coconut cream: Use only the thick cream from a refrigerated can for richness and stability
- Maple syrup: Add to the blender for natural sweetness and blend until fully incorporated
- Coconut oil: Melt and add to filling to help the cheesecake set properly when chilled
- Fresh lemon juice: Squeeze and add to filling for that classic tangy cheesecake flavor
- Graham crackers: Crush into fine crumbs and mix with melted vegan butter for the crust
- Fresh raspberries: Wash and arrange on top of set cheesecake just before serving
Let's Make These Together
- Prepare the crust base
- Start by combining your graham cracker crumbs with melted vegan butter in a medium bowl. Mix it thoroughly until it resembles wet sand and holds together when you press it between your fingers. This is the foundation of your cheesecake, so take your time pressing it firmly into your springform pan, creating an even layer that will support that gorgeous creamy filling. Pop it in the fridge while you work on the next step.
- Create the silky filling
- This is where the magic happens! Take your soaked and drained cashews and add them to your high-speed blender along with the coconut cream, maple syrup, melted coconut oil, fresh lemon juice, and vanilla extract. Blend on high for a few minutes, stopping to scrape down the sides as needed. You're looking for a completely smooth, silky texture with absolutely no graininess. When it's ready, it should be thick, creamy, and utterly irresistible.
- Assemble and chill
- Pour your beautiful cashew filling over the chilled crust and use a spatula to spread it evenly across the surface. Give the pan a few gentle taps on the counter to release any trapped air bubbles, then cover it and transfer to the refrigerator. Now comes the hardest part – waiting! Let it set for at least 4 hours, but overnight is truly best for that perfect, sliceable texture.
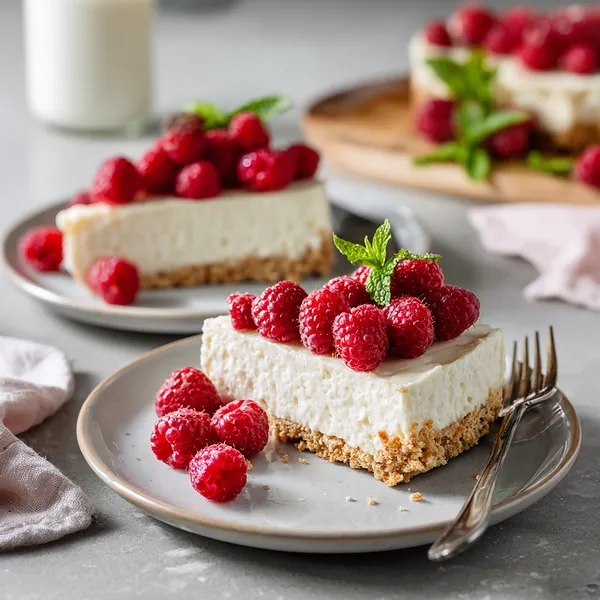
- Garnish and serve with flair
- When your cheesecake is completely set, carefully remove it from the springform pan and transfer to your prettiest serving plate. This is your moment to shine – top it with those gorgeous fresh raspberries and delicate edible flowers to create a dessert that's as beautiful as it is delicious. Slice with a hot, clean knife for perfect portions.
 pin it
Switch Things Up
I'll never forget the first time I made this cheesecake for my friend's birthday dinner. She'd recently gone vegan and was convinced she'd have to give up her favorite desserts forever. When I brought out this cheesecake, topped with those gorgeous raspberries and edible flowers, her eyes lit up. The moment she took that first bite, she actually gasped – that's how creamy and rich it was. She couldn't believe it was completely plant-based! Since then, I've made this recipe dozens of times, tweaking the toppings based on what's in season. Sometimes I'll use blueberries and lemon zest, other times I'll go for a chocolate drizzle. But no matter how I dress it up, the reaction is always the same: pure delight. The best part is watching people's faces when they realize there's not a drop of dairy in it. It's become my go-to recipe for converting skeptics into plant-based dessert believers!
Perfect Pairings
This vegan no-bake cheesecake pairs beautifully with a variety of accompaniments. Serve it alongside a hot cup of herbal tea – chamomile or mint work wonderfully to balance the richness. For a more decadent experience, drizzle some melted dark chocolate or berry coulis over each slice. Fresh fruit compote made with strawberries or mixed berries complements the creamy texture perfectly. If you're serving it at a dinner party, pair it with a light sparkling rosé or a dessert wine. For coffee lovers, a rich espresso or cappuccino cuts through the sweetness beautifully. You can also serve it with a dollop of coconut whipped cream for extra indulgence.
 pin it
Frequently Asked Questions
- → Can I make this cheesecake without a high-speed blender?
While a high-speed blender like a Vitamix or Blendtec produces the smoothest results, you can use a regular blender or food processor – just blend longer and scrape down the sides more frequently. You may need to add a tablespoon or two of extra coconut cream to help it blend smoothly. The texture might be slightly less silky, but it will still be delicious.
- → How long does this cheesecake need to set?
The minimum setting time is 4 hours, but for the best texture and clean slices, I highly recommend letting it set overnight (8-12 hours). The coconut oil needs time to solidify completely, and the longer setting time allows the flavors to meld beautifully. If you're in a rush, you can place it in the freezer for 2-3 hours instead.
- → Can I use a different type of nut instead of cashews?
Cashews are ideal because of their mild flavor and creamy texture when blended, but you can experiment with blanched almonds or macadamia nuts. Keep in mind that other nuts may have stronger flavors that will affect the final taste. Macadamia nuts will give you a similar creamy result, while almonds might create a slightly grainier texture even when blended thoroughly.
- → What can I use instead of graham crackers for the crust?
You have plenty of options! Crushed digestive biscuits, vanilla wafers, or gingersnap cookies all work wonderfully. For a gluten-free version, use gluten-free graham crackers or almond flour mixed with a bit of maple syrup and coconut oil. You could even make a raw crust using dates and nuts blended together for a healthier alternative.
- → How do I know when the cheesecake is set and ready to serve?
The cheesecake is ready when the center is firm to the touch and doesn't jiggle when you gently shake the pan. If you press your finger lightly on the surface, it should feel solid rather than soft or liquidy. The edges may be slightly firmer than the center, which is normal. If it still seems too soft, give it a few more hours in the refrigerator.
- → Can I freeze this cheesecake for later?
Absolutely! This cheesecake freezes beautifully for up to 2 months. I recommend slicing it first, then wrapping individual slices in plastic wrap and storing them in an airtight container. This way you can thaw only what you need. To serve, transfer slices to the refrigerator and let them thaw for 3-4 hours, then add fresh toppings just before eating.
Conclusion
This vegan no-bake cheesecake proves that plant-based desserts can be just as indulgent and satisfying as their traditional counterparts. The combination of creamy cashew filling, buttery crust, and fresh fruit creates a dessert that's both elegant and approachable. Whether you're serving it at a dinner party or enjoying a quiet slice with afternoon tea, this cheesecake delivers on flavor, texture, and visual appeal. The no-bake method makes it accessible for warm summer days when you don't want to turn on the oven, and the overnight setting time means you can prepare it ahead for stress-free entertaining.