
 pin it
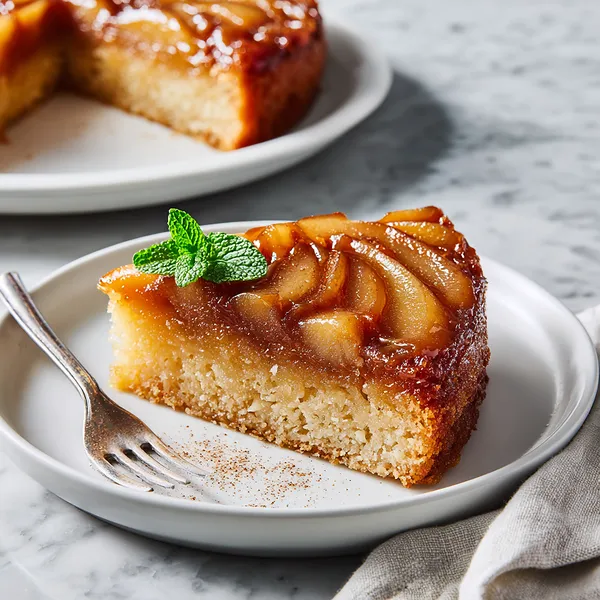
I first encountered this magical dessert at my grandmother's house on a crisp October afternoon. She pulled it from the oven, let it cool for exactly ten minutes (she was very precise about this), then flipped it onto her favorite cake stand with such confidence that I thought she was some kind of kitchen wizard. The way those apple slices fanned out in a perfect spiral, coated in that deep amber caramel, looked like something from a bakery window. I remember thinking it must be incredibly difficult to make, but she just laughed and said it was one of the easiest impressive desserts she knew. That day, I had two slices – one plain and one with ice cream – and I've been hooked ever since. What makes this cake special is how the apples on the bottom (which become the top) get this incredible texture from baking in the caramel. They're tender but not mushy, sweet but with that slight tang that keeps you coming back for more. The cake itself is buttery and moist with just enough cinnamon to complement the apples without overwhelming them. It's the kind of recipe that makes you look like a professional baker even if you're still figuring out the basics.
Why I love this recipe
What I love most about this recipe is how it transforms simple ingredients into something spectacular. There's something deeply satisfying about the dramatic reveal when you flip the cake – it never gets old, even after making it dozens of times. I love that it works equally well for a casual weeknight dessert or a special occasion, and it actually tastes better the next day when the caramel has really soaked into the cake. The recipe is forgiving too; I've made it with different apple varieties, adjusted the spices, and even tried it with pears once (also amazing). It's one of those recipes that makes your house smell incredible while it's baking, and that anticipation is almost as good as eating it. I also appreciate how it teaches you the basics of caramelization without being scary – you just melt butter and sugar together, arrange your apples, and let the oven do the magic. Most importantly, this cake brings people together. Every time I make it, someone tells me a story about their grandmother's version or asks if they can take a slice home. That's the power of a really good classic recipe.
What You Need From Your Kitchen
- Apples: Peel, core, and slice into 1/4-inch thick slices for even cooking and beautiful presentation
- Unsalted Butter: Divide into two portions – one for the caramel base and one for the cake batter, softened to room temperature
- Brown Sugar: Creates the rich caramel layer that coats the apples with deep molasses flavor
- All-Purpose Flour: Provides structure to the cake; measure by spooning into the cup and leveling off
- Eggs: Bring to room temperature for better incorporation into the batter
- Whole Milk: Adds moisture and richness to the cake; can substitute with 2% milk if needed
Let's Make These Together
- Create the Caramel Foundation
- Start by preparing your cake pan with the butter and brown sugar mixture. This creates that gorgeous caramelized layer that will become the show-stopping top of your cake. Arrange your apple slices in an overlapping circular pattern – take your time with this step because this design will be what everyone sees when you flip the cake. Think of it as edible art that you get to eat later.
- Mix Your Dry Ingredients
- Combine all your dry ingredients in a bowl, making sure the baking powder and cinnamon are evenly distributed throughout the flour. This simple step ensures every bite of your cake has consistent flavor and rise. The cinnamon adds warmth that complements the apples perfectly without overwhelming them.
- Build the Cake Batter
- Cream your butter and sugar until it's fluffy and pale – this incorporates air that helps your cake rise beautifully. Add your eggs one at a time, really beating them in so everything emulsifies properly. This creates that tender, moist crumb everyone loves in a good cake.
- Bring It All Together
- The alternating method of adding dry ingredients and milk might seem fussy, but it prevents overmixing and results in the most tender cake texture. Start and end with the dry ingredients, mixing gently just until combined. Pour this luscious batter over your arranged apples and spread it evenly to every edge of the pan.
- Bake to Perfection
- While your cake bakes, your kitchen will smell absolutely incredible – cinnamon, caramelizing sugar, and apples create the coziest aroma. Watch for that golden brown top and test with a toothpick to know it's done. The cooling and flipping process is the moment of truth, so follow the timing carefully for that perfect reveal.
 pin it
Switch Things Up
I'll never forget the first time I flipped this cake out of the pan – my hands were shaking because I was so worried it wouldn't work. But when those perfectly caramelized apples revealed themselves, glistening like edible jewels, I actually gasped. Now I make this every fall, and it's become my signature dessert. I love using a mix of Granny Smith and Honeycrisp apples for the perfect balance of tart and sweet. Once, I was running late and thought I'd ruined it by leaving it in the oven a few minutes too long, but turns out that extra time just made the caramel even richer. My secret? I always add an extra tablespoon of butter to the caramel layer because, well, why not? The smell of this baking fills the entire house with warmth, and people always ask for the recipe before they've even taken their first bite.
Perfect Pairings
This cake pairs beautifully with a scoop of vanilla bean ice cream that melts into the warm caramel, or a dollop of freshly whipped cream with a hint of cinnamon. For an extra special touch, serve it alongside hot spiced apple cider or a strong cup of coffee. If you're feeling indulgent, drizzle some extra salted caramel sauce over the top and watch it disappear even faster.
 pin it
Frequently Asked Questions
- → Can I use a different type of pan for this cake?
While a 9-inch round cake pan works best for the classic presentation, you can use a 9-inch square pan or even an 8-inch cast iron skillet. Just be aware that cooking times may vary slightly, and the presentation will look different. Avoid using a springform pan as the caramel may leak.
- → What's the best type of apple to use?
Firm, tart apples work best as they hold their shape during baking and provide a nice contrast to the sweet caramel. Granny Smith is the classic choice, but Honeycrisp, Braeburn, or a mix of varieties adds complexity. Avoid Red Delicious or McIntosh as they become too soft and mushy when baked.
- → Why did my cake stick to the pan?
This usually happens if you wait too long to flip the cake after removing it from the oven. The caramel needs to still be slightly fluid to release properly. Make sure to run a knife around the edges and flip at exactly 10 minutes. Next time, you can also line the bottom of the pan with parchment paper for insurance.
- → Can I make this cake ahead of time?
Absolutely! This cake actually improves after sitting for a day as the caramel soaks into the cake, making it even more moist and flavorful. Bake it, let it cool completely, then cover and store at room temperature for up to 2 days or refrigerate for up to 5 days. You can warm individual slices in the microwave for 15-20 seconds before serving.
- → My caramel hardened too much - what went wrong?
If your caramel hardens and doesn't have that glossy, pourable quality, it may have been cooked too long or at too high a temperature initially. When making the caramel base, you just want to melt the butter and sugar together until combined, not actually cook it into hard caramel. The baking process will do the rest of the caramelization for you.
- → Can I substitute the butter or milk for dietary restrictions?
For dairy-free versions, you can use plant-based butter alternatives and non-dairy milk like almond or oat milk. The texture will be slightly different but still delicious. For lower fat versions, you could try substituting some of the butter with applesauce, though this will change the richness and texture of the cake somewhat.
Conclusion
This Caramel Apple Upside Down Cake is pure comfort in dessert form. The combination of tender spiced cake with those gorgeous caramelized apples creates something truly special that works for any occasion. Whether served warm with vanilla ice cream or at room temperature with whipped cream, it's guaranteed to become a family favorite that you'll make again and again.