
 pin it
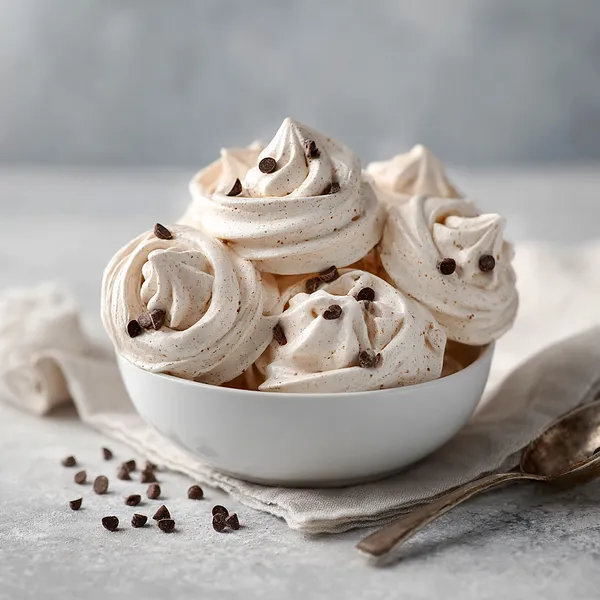
I discovered meringues during a trip to Paris where I wandered into a tiny patisserie near the Louvre. The baker was just pulling a tray of perfect, cloud-like meringues from the oven, and I was mesmerized by their delicate peaks and crispy texture. I bought three on the spot and devoured them while walking along the Seine. When I got home, I was determined to recreate that magic in my own kitchen. After a few attempts and some trial and error with humidity and oven temperature, I finally nailed it. Then I had the brilliant idea to add chocolate chips, because honestly, what isn't better with chocolate? These meringues remind me of that beautiful Parisian afternoon, but with my own chocolatey twist. They're light enough that you don't feel guilty eating three or four, but satisfying enough to curb any sweet tooth. The key is patience - letting those egg whites whip to stiff peaks and baking them low and slow. The result is pure magic.
Why I love this recipe
What I love most about these chocolate chip meringues is how they transform just three basic ingredients into something that looks and tastes incredibly sophisticated. There's something almost therapeutic about watching the egg whites transform from clear liquid into glossy white peaks - it's like kitchen magic. They're also incredibly forgiving once you understand the technique. Yes, they require patience with the long baking time, but it's entirely hands-off. I love that they're naturally gluten-free, so I can share them with all my friends without worrying about dietary restrictions. The texture is what really gets me though - that satisfying crack when you bite into the crispy shell, followed by the slightly chewy center studded with melty chocolate. They feel indulgent but are surprisingly light on calories. Plus, they make your kitchen smell absolutely amazing while they bake. Whether I'm stress-baking, need an impressive dessert for guests, or just want something sweet without the heaviness of traditional cookies, these meringues are my go-to.
What You Need From Your Kitchen
- Egg Whites: Bring to room temperature and ensure no yolk contamination for best whipping results
- Granulated Sugar: Add gradually while whipping to create glossy, stable peaks
- Cream of Tartar: Stabilizes the egg whites and helps maintain structure during baking
- Vanilla Extract: Add after sugar for sweet aromatic flavor throughout
- Mini Chocolate Chips: Fold gently into meringue just before piping to maintain airiness
Let's Make These Together
- Prep Your Workspace
- Start by preheating your oven to a low 225°F and lining your baking sheets with parchment paper. This low temperature is essential - we're drying the meringues rather than baking them. Make absolutely sure your mixing bowl and beaters are spotlessly clean and completely dry. Even the tiniest bit of grease or moisture can prevent your egg whites from reaching those perfect stiff peaks. Separate your eggs carefully, and let those whites come to room temperature while you prep everything else.
- Create Perfect Peaks
- Begin whipping the egg whites with salt on medium speed until they get foamy. Add the cream of tartar and increase the speed. Now comes the crucial part - add that sugar gradually, one tablespoon at a time, beating well between each addition. This slow process allows the sugar to dissolve completely, creating that gorgeous glossy texture. Once all the sugar is incorporated, add your vanilla and beat on high until you achieve stiff, shiny peaks that stand straight up when you lift the beater.
- Fold and Pipe
- Gently fold those mini chocolate chips into your beautiful meringue using a rubber spatula with a folding motion. Transfer the mixture to a piping bag fitted with a star tip and pipe small swirled mounds onto your prepared baking sheets. Each mound should be about 1.5 inches wide with nice peaks and swirls for that professional bakery look.
- Bake and Patience
- Slide those trays into your preheated oven and bake for 90 minutes without peeking. When time's up, turn off the oven but leave the meringues inside to cool completely - at least an hour or even overnight. This gradual cooling is what gives them that perfect crispy texture without any cracks. Once completely cool, store them in an airtight container where they'll stay crispy for up to a week.
 pin it
Switch Things Up
I first made these meringues on a rainy Sunday afternoon when I had leftover egg whites from making carbonara the night before. I didn't want to waste them, so I pulled up a meringue recipe and decided to jazz it up with chocolate chips. The house smelled incredible as they baked, and I couldn't resist sneaking one while they were still slightly warm. The crispy shell cracked perfectly to reveal that chewy center. Now, I make them whenever I need something sweet but don't want to feel too heavy afterward. Sometimes I add a hint of peppermint extract around the holidays, or swap the mini chips for chopped dark chocolate. They're endlessly customizable and always impressive.
Perfect Pairings
These chocolate chip meringues pair beautifully with a strong espresso or cappuccino - the bitter coffee balances the sweetness perfectly. They're also wonderful served alongside fresh berries and whipped cream for an elegant dessert platter. Try crumbling them over vanilla ice cream for an amazing texture contrast, or serve them with a glass of dessert wine like Moscato. During the holidays, they're perfect with hot chocolate or eggnog. For a sophisticated touch, serve them alongside chocolate mousse or panna cotta.
 pin it
Frequently Asked Questions
- → Why did my meringues turn out sticky or chewy instead of crispy?
This usually happens due to humidity or underbaking. Meringues need to be completely dried out, which requires the full baking time plus cooling in the oven. If you live in a humid climate, you may need to add 15-20 minutes to the baking time. Also, make sure you're storing them in an airtight container - exposure to moisture will make them soft.
- → Can I use regular chocolate chips instead of mini chips?
Yes, but mini chips work better because they're lighter and distribute more evenly without weighing down the delicate meringue. If using regular chips, you might want to chop them into smaller pieces. Just be aware that larger chips may sink to the bottom slightly.
- → My egg whites won't whip up - what went wrong?
The most common culprit is grease contamination. Even a tiny bit of oil, butter, or egg yolk will prevent egg whites from whipping. Make sure your bowl and beaters are completely clean and dry. Also, older egg whites actually whip better than super fresh ones, and room temperature egg whites whip up faster and with more volume than cold ones.
- → Can I make these ahead of time?
Absolutely! Meringues are actually perfect for making ahead. Once completely cooled and stored in an airtight container at room temperature, they'll stay crispy and delicious for up to a week. Just make sure they're completely cool before storing, and don't refrigerate them as this will introduce moisture.
- → Why are my meringues browning in the oven?
Your oven temperature is too high. Meringues should remain white or just barely off-white. If they're browning, reduce your oven temperature by 25°F and check your oven's accuracy with an oven thermometer. Remember, we're drying these out, not baking them at a traditional temperature.
- → What should I do with the leftover egg yolks?
Save them for making custards, carbonara, hollandaise sauce, lemon curd, or homemade mayonnaise! Store them in an airtight container in the refrigerator for up to 2 days, or freeze them with a pinch of salt or sugar for up to 3 months.
Conclusion
These chocolate chip meringues are proof that simple ingredients can create something truly magical. They're the perfect balance of sweet and light, with just enough chocolate to satisfy any craving. Whether you're serving them at a party, packaging them as gifts, or keeping them all to yourself (no judgment here!), these cloud-like treats never disappoint. The crispy exterior gives way to a slightly chewy center that's just heavenly. Plus, they store beautifully in an airtight container for up to a week, making them ideal for meal prep or unexpected guests.