
 pin it
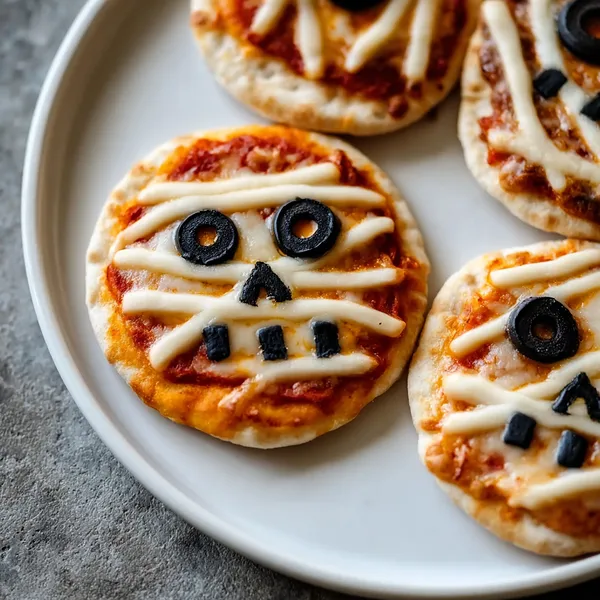
I first discovered the magic of mummy pizzas at a neighborhood Halloween block party about five years ago. A creative mom had set up a pizza decorating station, and I was immediately drawn to how simple yet impressive these looked. The concept is brilliantly straightforward: you start with mini pizza bases, spread a layer of your favorite pizza sauce, and then comes the fun part. Instead of just sprinkling cheese on top like regular pizza, you strategically place strips of string cheese or mozzarella to create bandage-like wraps across the pizza surface. The black olive slices become the mummy's eyes, and you can arrange them however you like for different expressions. What I love most is how forgiving this recipe is. If your cheese strips aren't perfect, it actually looks better because mummy bandages aren't supposed to be neat! When you bake them, the cheese melts slightly but holds its shape, creating those authentic-looking bandages. The combination of melted cheese, savory sauce, and the slight crispy edge of the pizza base creates texture and flavor that goes way beyond just novelty. These aren't just cute, they're genuinely delicious pizzas that happen to look amazing.
Why I love this recipe
This recipe holds a special place in my heart because it perfectly balances creativity with simplicity. You don't need to be a skilled cook or decorator to make these look amazing, which means kids can fully participate and feel proud of what they create. I love that it transforms a familiar comfort food into something festive without requiring exotic ingredients or complicated techniques. Every time I make these, I'm reminded that the best recipes aren't always the most complex ones, sometimes they're the ones that bring people together and create memories. The versatility is another huge plus. You can make them as simple or elaborate as you want, adjust the spiciness of the sauce for different age groups, and even accommodate dietary restrictions by using different cheeses or gluten-free crusts. I've made these dozens of times now, and they never fail to get enthusiastic reactions. There's something magical about food that makes people smile before they even take a bite. Whether you're hosting a kids' party, looking for a fun family dinner idea, or just want to embrace the Halloween spirit, these mummy pizzas deliver every single time.
What You Need From Your Kitchen
- Mini pizza crusts: Serve as the base for your mummy pizzas
- Marinara sauce: Spread evenly over each pizza base for tangy flavor
- Mozzarella cheese: Sprinkle as a base layer under the bandages
- String cheese: Pull apart into strips and arrange as mummy bandages
- Black olives: Slice and place as spooky mummy eyes
- Olive oil: Brush on crust edges for golden color
Let's Make These Together
- Prepare your workspace
- Start by preheating your oven and gathering all your ingredients. Line your baking sheet with parchment paper to prevent sticking and make cleanup easier. This is the perfect time to get kids involved in the prep work. Have them help arrange the pizza bases on the sheet and brush the edges with olive oil. Setting up an assembly line with sauce, cheese, and olives makes the decorating process smooth and fun.
- Build the pizza base
- Spread a generous layer of pizza sauce over each mini crust, making sure to cover the surface evenly but leaving a small border for the crust. Sprinkle a thin layer of shredded mozzarella over the sauce. This base layer helps the bandage strips stick better and adds extra cheesy goodness to every bite. Don't skip this step as it creates the foundation for your mummy masterpiece.
- Create the mummy bandages
- Here's where the magic happens! Pull apart string cheese into thin strips, or carefully cut mozzarella into strips if you're using block cheese. Lay the strips across the pizza in different directions, overlapping slightly to create an authentic bandaged look. Leave strategic gaps where the eyes will go. Remember, mummy bandages aren't supposed to be perfect, so embrace the messy, wrapped-up look. Each pizza will have its own personality!
- Add spooky details
- Place two sliced black olives in the gaps you left for eyes. You can position them close together for a surprised look, far apart for a goofy expression, or at different heights for a quirky personality. Some people like to add a small olive piece for a mouth. This is where kids really get creative, and no two mummies ever look the same.
- Bake to perfection
- Slide your baking sheet into the preheated oven and bake for 10-12 minutes. Watch as the cheese melts and gets slightly golden, and the crust edges become crispy. The aroma that fills your kitchen is absolutely incredible. The cheese strips will melt slightly but maintain their bandage shape. Once the cheese is bubbly and the crust is golden, they're ready to come out.
- Serve and enjoy
- Let the pizzas cool for just a few minutes before serving. They'll be extremely hot right out of the oven! Transfer them to a serving platter and watch everyone's faces light up when they see these adorable mummy creations. Serve them as a main course, party appetizer, or fun snack. They're best enjoyed warm when the cheese is still melty and gooey.
 pin it
Switch Things Up
I'll never forget the first time I made these mummy pizzas for my nephew's Halloween party. I was scrambling for a last-minute activity that would keep a dozen sugar-hyped kids entertained, and these were my saving grace. Watching their little faces light up as they carefully placed olive eyes and draped cheese strips across their pizzas was priceless. One kid made a cyclops mummy, another created a mummy with a crooked smile, and they were all so proud of their creations. When we pulled them out of the oven, the kitchen filled with the most incredible aroma of melted cheese and herbs. The kids devoured them in minutes, already asking when we could make them again. Now it's become our annual Halloween tradition, and I've made batches for school parties, neighborhood gatherings, and even adult Halloween get-togethers where grown-ups get just as creative with their decorating!
Perfect Pairings
These Halloween Mummy Pizzas pair wonderfully with a fresh Caesar salad for a complete meal, or serve them alongside crispy sweet potato fries for extra Halloween orange color. For drinks, consider apple cider, orange soda, or a spooky green smoothie. If you're hosting a party, create a Halloween spread with these pizzas as the main attraction, complemented by vegetable sticks with ranch dip, popcorn balls, and fruit kabobs. For adults, they go surprisingly well with a light Italian beer or a glass of Chianti.
 pin it
Frequently Asked Questions
- → Can I make these ahead of time?
Yes! You can assemble the mummy pizzas completely and refrigerate them for up to 4 hours before baking. Just add 1-2 minutes to the baking time if you're putting them in the oven cold. You can also freeze assembled unbaked pizzas for up to 1 month. Bake from frozen, adding 5-7 minutes to the cooking time.
- → What if I don't have string cheese?
No problem! You can use regular mozzarella cheese cut into thin strips, or even use pre-shredded mozzarella arranged in lines. Provolone cheese also works well. The key is creating strips that look like bandages, so any white cheese that melts nicely will work.
- → Can I use different toppings?
Absolutely! Feel free to add pepperoni, cooked sausage, mushrooms, or any other pizza toppings you love. Just place them under the cheese bandages so the mummy design stays visible. Keep in mind that too many toppings might make it harder for the cheese strips to stick.
- → How do I make these gluten-free?
Simply use gluten-free pizza crusts, pita bread, or even cauliflower pizza bases. Everything else in the recipe is naturally gluten-free. Make sure to check that your marinara sauce doesn't contain any gluten-containing thickeners, though most are naturally gluten-free.
- → My cheese strips keep sliding off. What am I doing wrong?
Make sure you have a thin layer of sauce and shredded cheese as a base before adding the strips. This creates a sticky surface for the bandages to adhere to. Also, don't make your strips too thick or too thin. About 1/4 inch wide works perfectly. Finally, make sure your oven is fully preheated so the cheese starts melting quickly when you put them in.
- → Can adults enjoy these too or are they just for kids?
These are absolutely enjoyed by all ages! I've served them at adult Halloween parties and they're always a hit. Adults appreciate the playful creativity and the delicious taste. You can even make them slightly more sophisticated by using gourmet cheeses, homemade sauce, or adding roasted vegetables. The fun presentation appeals to the kid in all of us!
- → How should I store leftovers?
Store leftover mummy pizzas in an airtight container in the refrigerator for up to 3 days. Reheat them in a 350°F oven for 5-7 minutes or in an air fryer for 3-4 minutes to restore the crispy crust. Microwaving will work but may make the crust soggy. They're still tasty cold too, though the cheese won't be as gooey.
Conclusion
These Halloween Mummy Pizzas are the perfect combination of spooky and delicious, making them ideal for Halloween parties, family dinners, or even a fun weekend cooking activity with kids. They're incredibly easy to customize, allowing each person to create their own unique mummy face. The contrast between the gooey melted cheese, tangy marinara sauce, and crispy pizza base creates a satisfying bite every time. Best of all, they come together in under 30 minutes, making them a stress-free option for busy Halloween celebrations.